Over the last few years color negative film has become a major part of my portfolio, being used to capture both delicate subtleties as well as landscape scenes with nearly endless dynamic range. The film can be incredibly flexible and adaptive to many situations which makes it quite appealing when you don’t know what the light is going to be like, or when you have a specific look that you are going for. A lot of people get mystified by color negatives, so let’s take a look at a few pointers to help you get the most out of them.
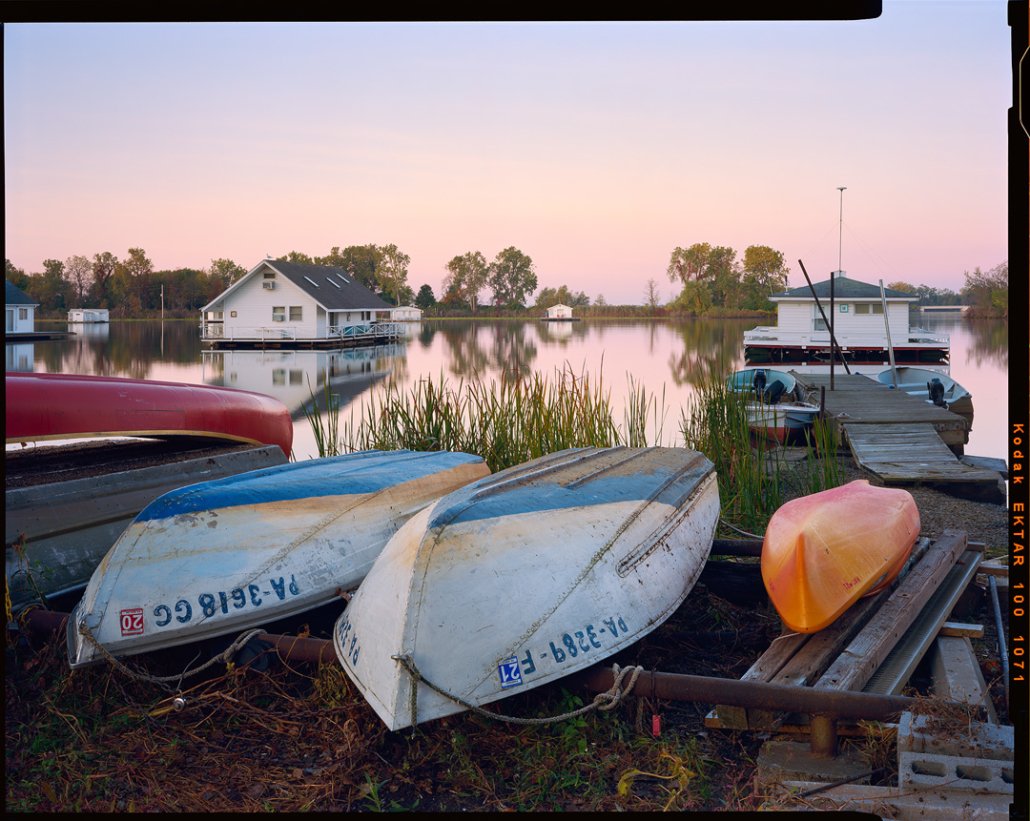
“Boat House Sunrise” – A great example showing how negative film can capture both subtleties in the sky as well as a wide dynamic range from deep shadows to sunrise colors. Ektar 100, 135mm lens, 2 seconds at f32, 2 stop soft GND filter.
Color Negative Film – The Jack of All Trades
One of the biggest things to know about color negatives is how capable they are at handling a wide variety of subject matter and light. Nearly anything you throw at them can be captured if you expose accordingly and nurse the film just right during the scanning or printing process. If your goal is to capture the extreme dynamic range of a backlit forest, no problem. The same goes if you desire a softer color palette of a scene without much in the way of contrast. A general rule to know as far as color saturation goes is that if you underexpose the film, you tend to get stronger and sometimes a bit inaccurate saturation. If you overexpose the film, you get softer colors and lighter contrast.
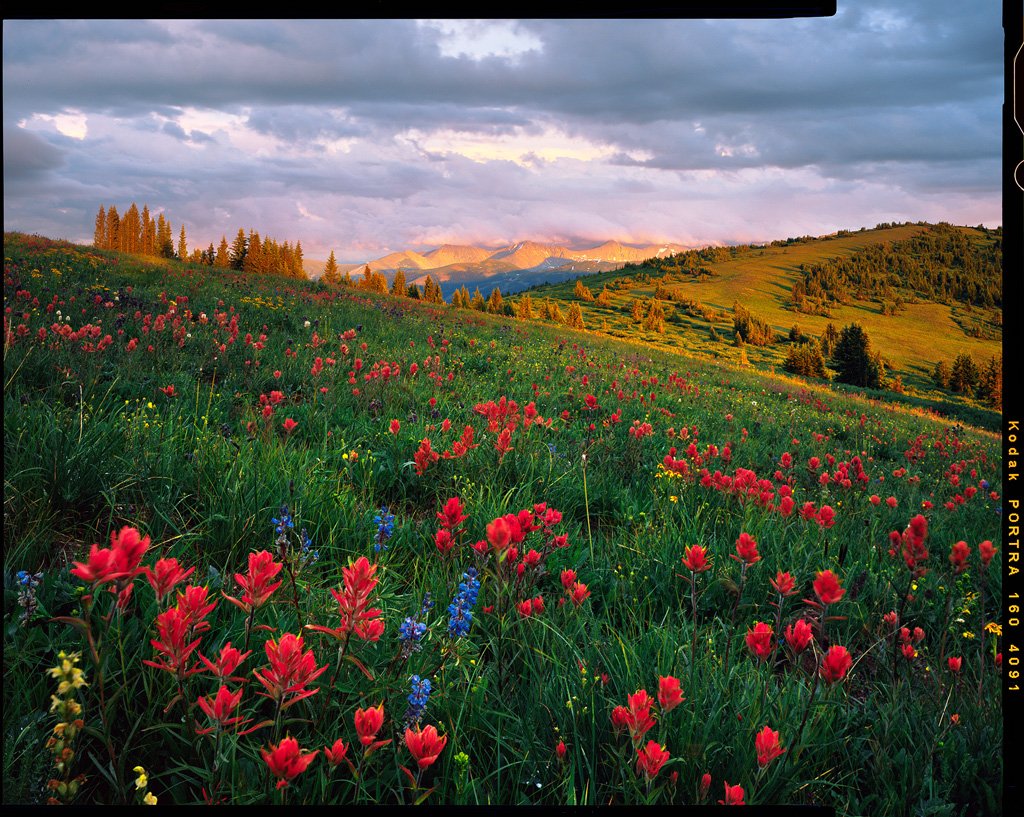
“Shrine Paintbrush” – An example of a half stop underexposed sheet of Portra 160, resulting in colors that resemble the saturation of a slide. 90mm Lens, 3 seconds at f22, 2 stop soft GND filter.
Underexposed = Thin negative, saturated colors, strong contrast. Colors can become rather inaccurate if severely underexposed (more than a stop or two).
Exposed at Box Speed = Natural to somewhat strong colors depending on film stock. Good for general-purpose landscape shooting when moderate contrast and color is desired, though a little extra exposure typically won’t hurt.
Overexposed = Dense negative, soft colors, subtle contrast. This is often used for portraits to keep soft skin tones. Nearly endless details can be pulled out of the highlights.

“Homestead Sunset” – Example of an overexposed negative. I typically meter Portra 160 at ISO 100, resulting in an automatic 2/3rds stop overexposure. I then also overexpose further for most of my prairie scenes by an additional 2/3rds stop. The sky was held back with a 1 stop soft GND, though it was two to three stops brighter than the ground. Too much filter would have resulted in a darkening of the tree. The foreground was metered at 100 with an additional 2/3rds stop added, meaning the sky was about three stops overexposed even with the filter. The result is a softer color palette for a sunset that had rather strong colors in person. 135mm lens, 4 seconds at f32, 1 stop soft GND filter.
Expose for the Shadows
This is just about the only thing you’ll really need to know about negative film. A polar opposite to slides which can’t retain much detail at all if overexposed, negatives give you ample room to really reach into the brightest highlights. So long as the darker tones in a scene are exposed somewhat close to neutral the film will take care of the rest. This isn’t to say that it’s best to expose deep shadows as neutral, you still want subjects such as black rocks or pine trees in the shade to look properly dark. If you want to spot meter your scene you will likely want to consider placing these sorts of objects at -1 to -½ stop. More realistically, it works well to find the most important object (often the subject) in a scene and meter for that. Think about how you want the luminance of that object to be rendered. If a red barn is your subject, that is usually a good neutral tone and should be exposed as such. If it’s the white bark of aspen trees you’ll want to add a stop, perhaps more depending on how the light is hitting them. If you focus on getting your most important object exposed properly, chances are the rest of the scene can be handled by negative film and you won’t have underexposed shadows.
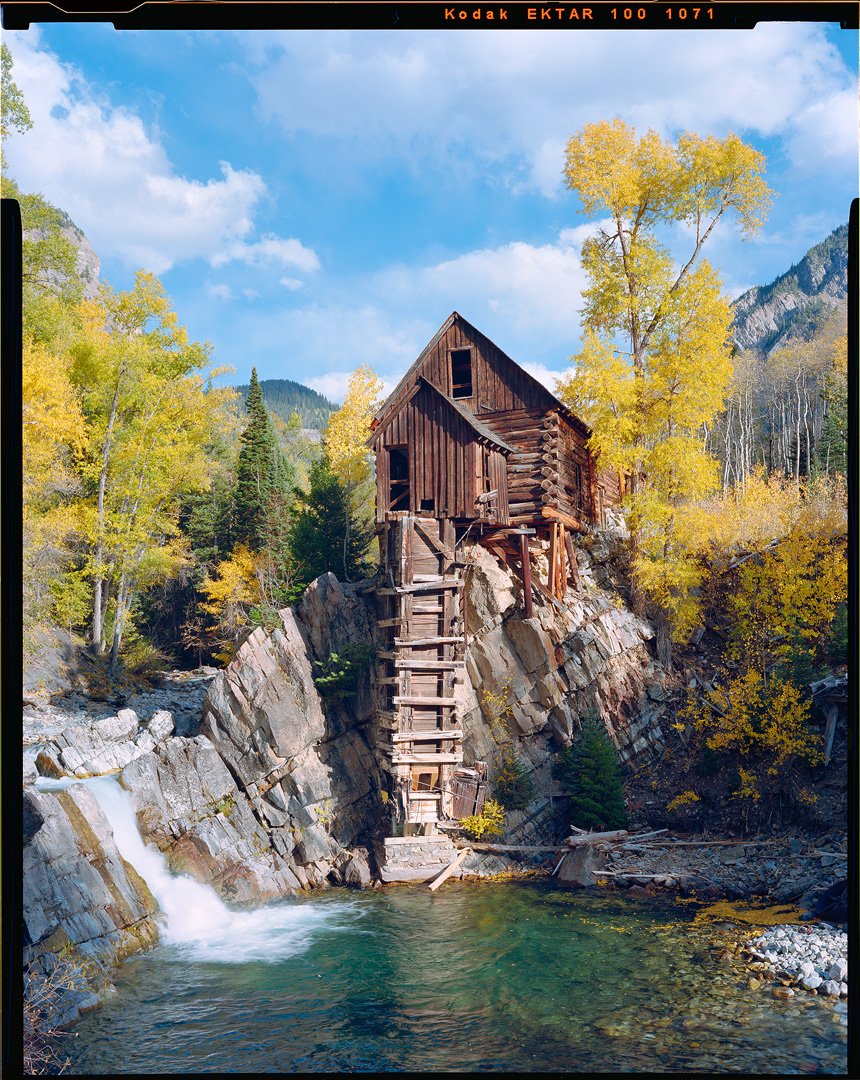
A daylight scene with a wide range of tones can easily be captured on negative film. The lower half of the frame was the area I average metered as I didn’t want the rocks on the bottom right to get lost in the mud of underexposure. The sky was a bit more than a stop brighter, but a filter would have been awkward and noticeable on this image. Ektar 100, 135mm lens, ⅛ second at f22, no filters.
Personally, I’m an average metering person. Anyone who has read some of my blog posts in the past knows that I use a small digital camera and simply point it at the scene I want to photograph to get a meter reading. With color negatives I mostly focus on the foreground reading, which is usually the darker part of the frame. When I’m working with a shaded foreground and a bright sky, I’ll take a reading of both and use a GND filter to split the difference. If possible, it’s still best to use a GND filter with color negative film. While the film can handle a lot of highlight abuse, the colors in the sky will be more rich if you bring down the exposure with a GND filter. When a filter can’t be used because you’re shooting in the forest, have tall mountains or structures jutting up into the sky, etc then meter for the foreground and let the film handle the sky.
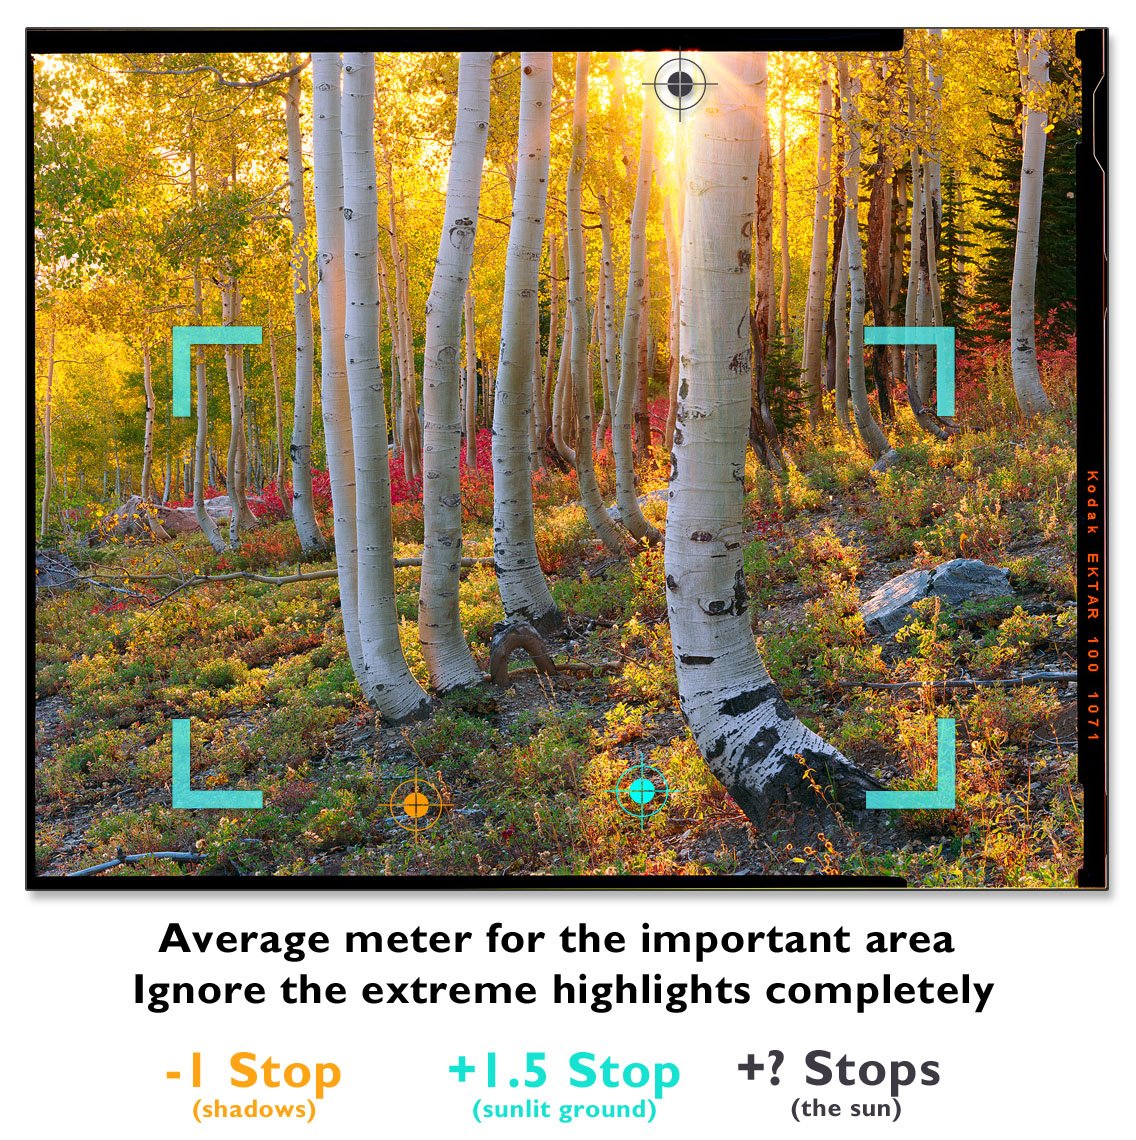
Image showing how I meter and work with most of my scenes that have extreme contrast. Light changes quickly in the last few minutes of the day, so time is short to spend on metering. So long as you get your important parts of the frames metered properly the film can handle the rest. Ektar 100, 300mm lens, 15 seconds at f64, no filters.
Average metering works very well for a portion of a frame that is either in the same light, or has reasonable contrast. In the foreground of the image above, using a modern camera that has center-weighted average or matrix metering will get you reliable results. The light hitting the ground was softened by both the forest canopy and the distant atmosphere as the sun was about to set. There was only a few stops of variation between the shaded ground and lit ground, and averaging the two will give you a proper exposure of that region. That is the approach you could take with a handheld spot meter. The sun and brightly lit forest canopy was not something that can be average metered along with the foreground by any camera; there is just too much variation between the two and slight repositioning of the meter will give wildly different results. It also could not be filtered with a GND so it was simply ignored when making the meter reading. One could argue that such an exposure would be impossible on slide film, it was up to Ektar to handle the range.
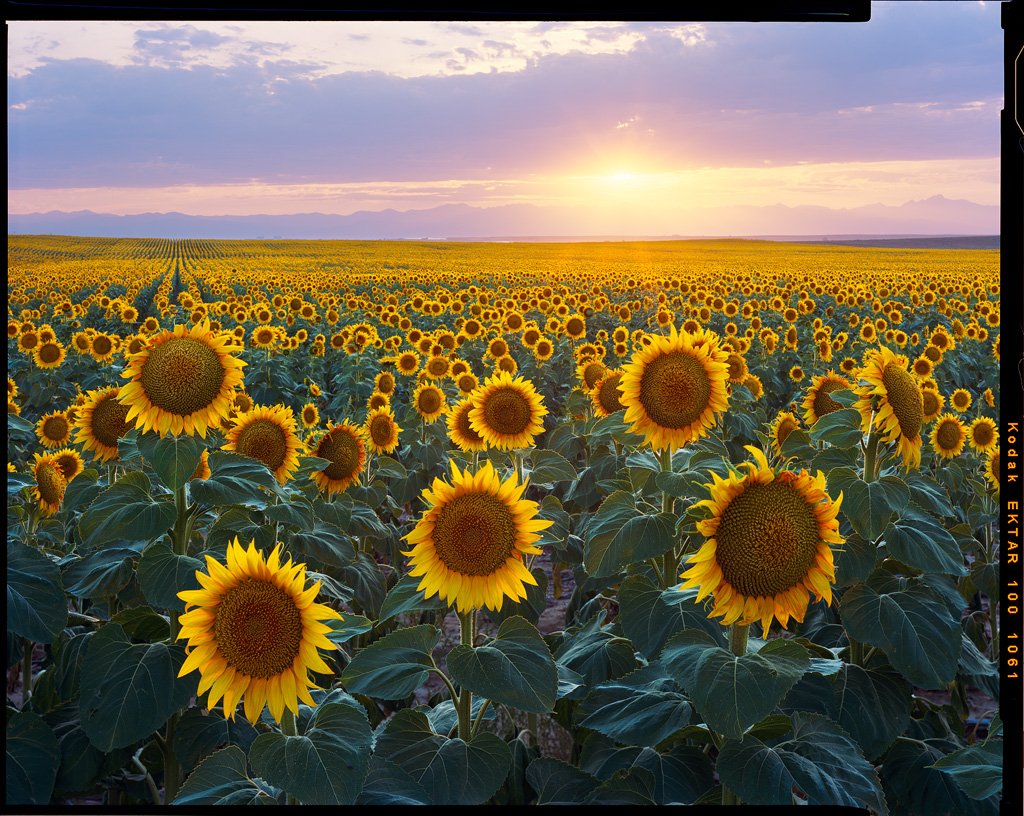
“Sunflower Sunset” – Negatives excel at backlit scenes, pleasantly balancing the glowing flowers with the actual sun. Ektar 100, 210mm lens, 2 seconds at f45, no filters (to avoid glare).
While it seems that negatives can handle endless range, there are some practical limits so don’t just go shooting into the sun all day long. Once the exposure gets several stops beyond reason, the tones get so smashed together in the highlights (densest part of the negative) that you can’t extract them to make a usable image. Color will get lost before detail, so you can expect desaturated highlights followed by indecipherable details as exposure reaches the extremes. It’s hard to know exactly when this happens, but in the above image you can see that you reach the limits somewhere around the sun itself. This is acceptable most of the time as you don’t really expect to resolve the ball of the sun together with a landscape in a single exposure. Again, for this scene I average metered the foreground. The dark green petals were a few stops darker than the sunlit flowers so an average reading was perfect. Using my small digital camera I pointed the lens down to see only the flowers and no sky, holding my hand over the lens to shade the sun so that flare didn’t cause any erroneous readings. I then shot for the meter reading supplied by the camera’s meter.
Conclusion
For the most part with negatives just err on the side of overexposure, quite a bit if you need to. As with slide film make sure that your most important subject will be exposed the way you want it to be rendered, but remember that you have a lot of room to reach into the highlights if needed. If in doubt, expose it a little bit more!
Name: Alex Burke
Location:
Description: I’m a large format landscape photographer from Greeley, Colorado. Working with a 4×5″ view camera, I photograph the majestic beauty of the off-the-beaten-path wilderness areas as well as the subtleties of the Great Plains. At home in places far and remote, the best images are created by taking the time to really get to know a place and growing a deeper connection with the landscape.
For educational tips on film landscape photography, check out my blog posts and ebooks here: http://www.alexburkephoto.com/educational-blog-posts/
Gallery: Alex Burke
Website: http://www.alexburkephoto.com/
FaceBook: @alexburkephoto
Twitter:
Instagram: @alexburkephoto
YouTube:


0 Comments